
Before doing all the following things, Install Java JDK or JRE into computer
Double click on eclipse.exe file and Go to Help à Software Updates
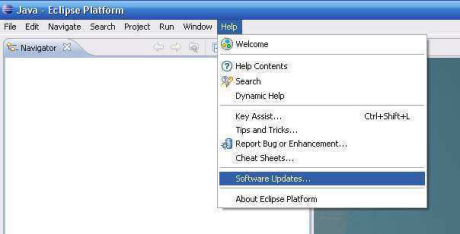
Click on the “Add Site” button in the following screenshot
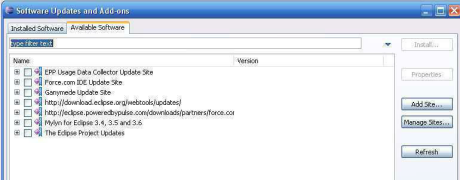
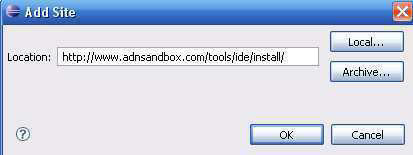
Add the URL "http://www.adnsandbox.com/tools/ide/install/" in the Location, then click "OK."
After we add the site, Eclipse will download the list of available plugins and display them in the Available Software dialogue.
Check the box next to the Force.com IDE plugin then click "Next"
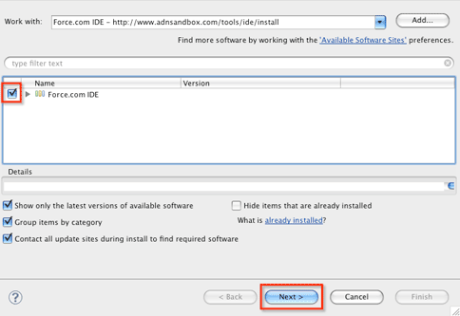
the Install Details dialogue, click "Next," then accept the terms and click "Finish."
The eclipse will download and install the Force.com IDE and any required dependencies.
When the installation is complete, Eclipse will prompt to restart. Click "Yes."
Once Eclipse restarts, select Windows ---> Openperspectives ---> others ---> select "Force.com", then click "OK."


Go to the Navigator and click on the right-click button and follow the path below:
New ---> Click on Force.com Project
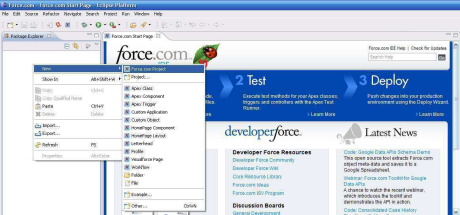
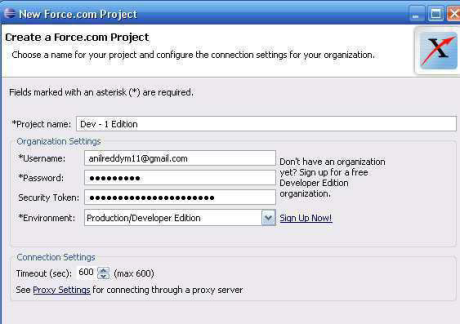
Enter the following details and click on the “Next” button
1. Project Name
2. User name
3. Password
4. Security Token(Note: We have to enter only Security token)
5. Environment àSelect Production/Developer Edition or Sandbox
6. Give Proxy Settings(Select Direct Connection to the Internet)

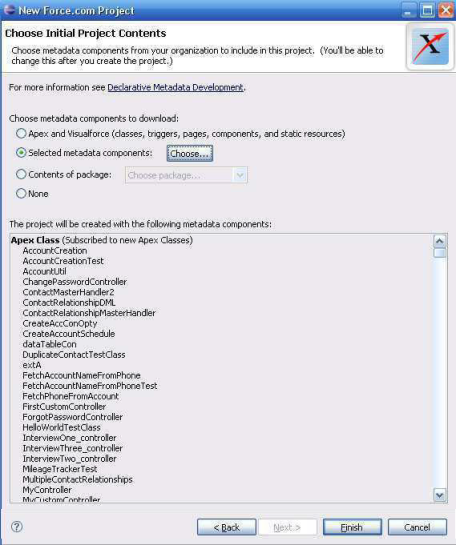
Choose the option “Selected metadata components” and click on the “Choose” button

Click on the “Select All” button to get all the metadata components and click on the “OK” button


Click on “Finish” button in the following screenshot
Once we click on the “Finish” button, a small window will come that gives the Progress Information
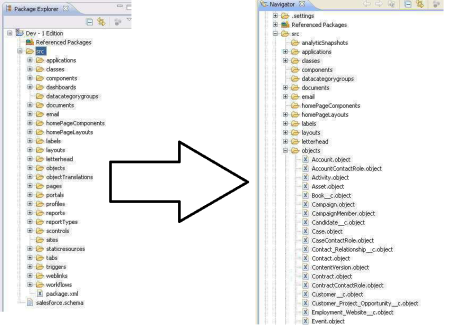
After completing all the above steps, we can able see all the metadata components that are there in the developer edition. The following screenshot gives information about all the metadata components. It will display all the objects, page layouts, triggers, Vf pages…etc that we have created in Developer edition
Note: Click on “+” symbol to get all the components under that section Ex: Click on “+” symbol beside the Objects to get all the standard and custom objects in the developer edition
Salesforce Interview Questions
Select the metadata component (Ex: Objects) from one sandbox(i.e Source Sanbox).
Click on the “Right Click” button and go the following path Force.com ---> Deploy to Server….

Inclined to build a profession as SalesForce Developer? Then here is the blog post on, explore SalesForce Training
STEP!:
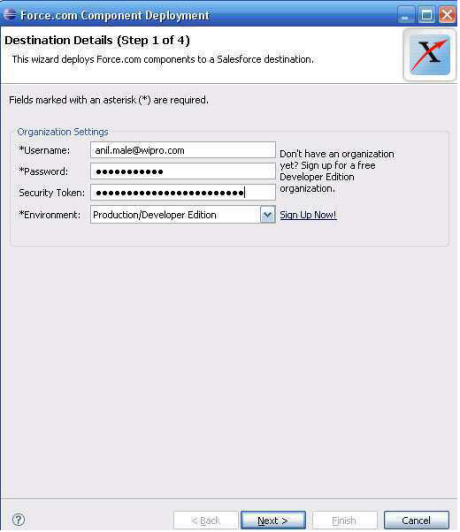
Enter the following Destination Sandbox details in the next screenshot
Note: I have taken the project with the user name: anilreddym11@gmail.com (Source Sandbox) and I am migrating the metadata from this sanbox to sandbox with the user name: anil.male@wipro.com (Destination sandbox)
Click on the “Next” button
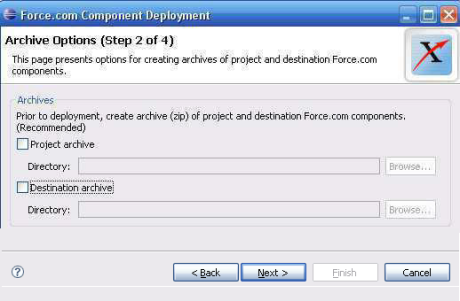
Step2: Uncheck “Destination archive” checkbox and click on the “Next” button
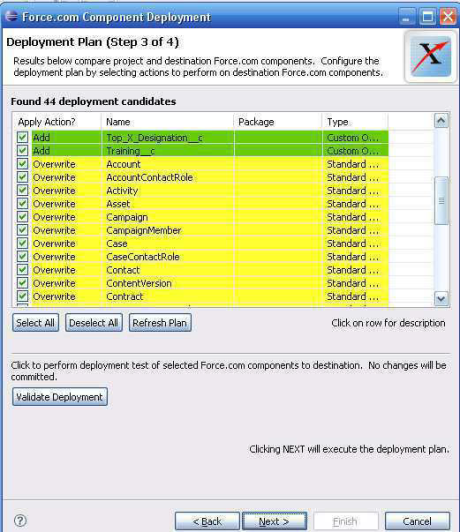
Step 3: The following screenshots display all the objects Green colour marked indicates that those objects are not there in the destination environment
Yellow colour marked indicates that those objects are already there in the destination environment and it will ask for overwriting.
Click the “Validate Deployment” button to validate the deployment, if it a success then Then click on the “Next” button
Step 4: Click on the “Finish” button
We need to take the two projects (i.e Sandboxes). First one is Source Sandbox and the second one is destination sandbox Anil Dev 1=Source Sanbox Anil Dev 2=Destination Sanbox
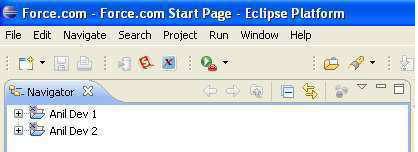
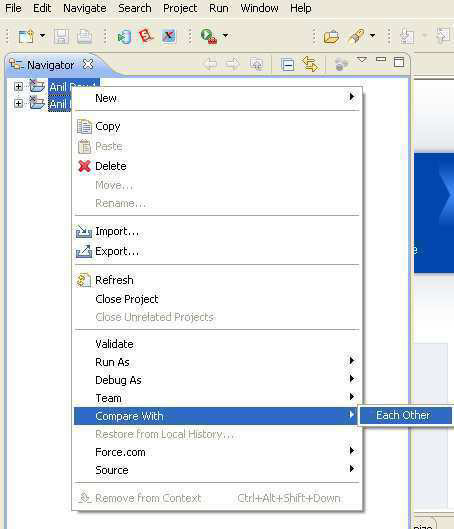
Select two projects and click on right-click button and go to the following path Compare with à Click on “Each Other”
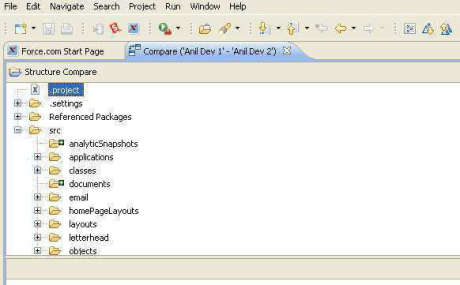
The following screenshot gives the all the components that are different each other (i.e the components that are different from source sandbox and destination sandbox) Click on symbol “+” sign beside any component (Ex: Objects) for seeing all objects
1. Double click on the component (Ex: Account Object)

The following screenshot says us about the differences from source sandbox to destination sandbox for Account Object.
The blue colour marked content shows that the component that is there in Anil Dev 1 and which is not there in Anil Dev 2

Use the following buttons at the right side of Text Compare window for moving the data from left to right and figuring the differences from top to bottom or vice versa.
 Copy all from left to right
 =Copy all non-conflicting changes from left to right
 =Copy current change from left to right
 = Copy current change from right to left
 = To move into Next Difference
 = To get the Previous Difference
 = To move into Next Change
 = =To move into Previous Change
The following screenshot shows that the Object called “Customer” that is there in Anil Dev1 sandbox. And moving that object into Anil dev 2 sandbox
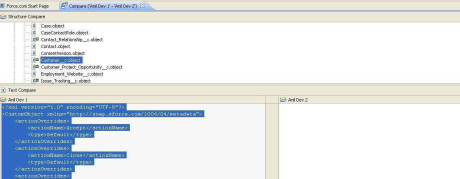
Click  on the button to copy current change from left to right.

Click on Ctrl+S to save the differences into Anil Dev 2 sandbox.
The following window shows the “Progress Information”

After Completion of above progress, make sure that no errors found then login into the Anil Dev 2 sandbox and check the “Customer” object is created or not.
Note: Using Eclipse, we can move the data from source sandbox to destination sandbox and also from description sandbox into source sandbox.
You liked the article?
Like: 0
Vote for difficulty
Current difficulty (Avg): Medium

TekSlate is the best online training provider in delivering world-class IT skills to individuals and corporates from all parts of the globe. We are proven experts in accumulating every need of an IT skills upgrade aspirant and have delivered excellent services. We aim to bring you all the essentials to learn and master new technologies in the market with our articles, blogs, and videos. Build your career success with us, enhancing most in-demand skills in the market.