In this lesson we will see how to create Inline LOV search page. Inline LOV is used to search with in the page. The following are the steps to create Inline LOV Step1: Create the new WorkSpace and project, create new page add AM to the page. Step2: Create new VO in respective BC4J. While creating VO change the package name of BC4J to “.lov.server” at end, generally List of Values VO ends with LOVVO and the example BC4J path is: Package (BC4J) : xxinlinelov.oracle.apps.po.inlineprj.lov.server VO name : InlineLOVVO Query in the VO is:
SELECT first_name FROM PER_ALL_PEOPLE_F
The Application Navigator of the project now looks like: 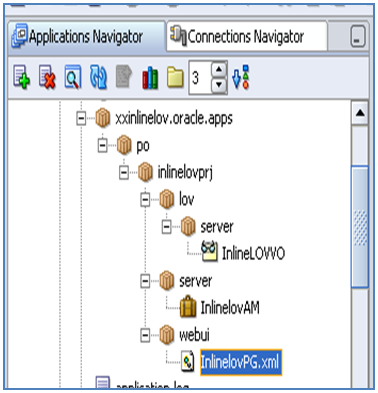 Step3: Under the main page create new item and select item style in property Inspector as “MessageLOVInput”. We can find List of Values region under Message LOV Input item. Right click on the List of Values region select New -> Table Using Wizard… Here we can create Table Style region only we cannot change the region style to another one. See the below image it shows that how the page structure will look now:
  Select the FirstName item under the table region and then in the property Inspector of that item check that in the Functional, Search Allowed is set to True. Step4: Select LOV Mappings in the structure of Message LOV input after that do the following changes in the property inspector of lovMap1. Functional: LOV Region Item : FirstName (the item to display in the LOV region) Return Item : item1 (the item to return) Criteria Item : item1 (criteria item works like in where condition value) Run the page and see the output. The first page of the output looks like the following:
 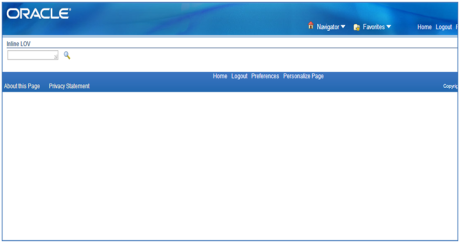 click on the search symbol
 ![]() so that it leads us to another page as shown in the below figure:
so that it leads us to another page as shown in the below figure:  Check the Radio Button of which employee you want to choose and then click on Select button or use Quick Select option to select the name which is required. After choosing the name it will display in the Message Text Input item as follows:
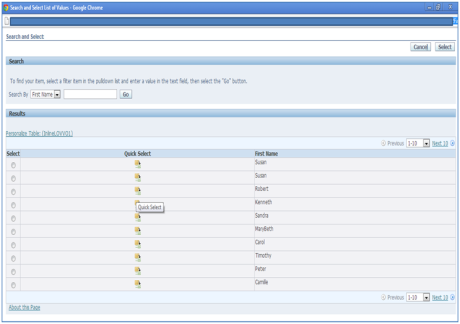 Check the Radio Button of which employee you want to choose and then click on Select button or use Quick Select option to select the name which is required. After choosing the name it will display in the Message Text Input item as follows:
 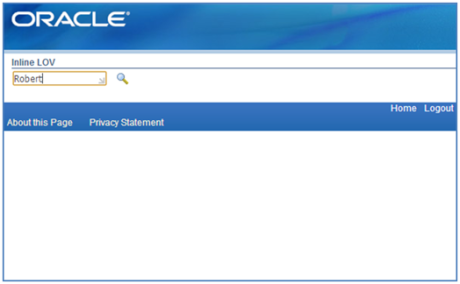 Check out our Popular Trainings Structure of OAF Advantages and Dis-Advantages of OAF Oracle data guard Training in Houston Creating First OAF Page in Project
You liked the article?
Like: 0
Vote for difficulty
Current difficulty (Avg): Medium

TekSlate is the best online training provider in delivering world-class IT skills to individuals and corporates from all parts of the globe. We are proven experts in accumulating every need of an IT skills upgrade aspirant and have delivered excellent services. We aim to bring you all the essentials to learn and master new technologies in the market with our articles, blogs, and videos. Build your career success with us, enhancing most in-demand skills in the market.

