Vagrant Boxes are prepackaged development environments that are the foundation of Vagrant. In most cases, this is usually just astripped and naked operating system such as Ubuntu, Debian, or CentOS. Boxes exist with the intention to be provisioned with additional features like Apache and PHP using tools like Chef or Puppet. This is really powerful, but it can be time consuming to setup the first configuration and difficult for beginners. Plus, not everyone has the skill-set of a system admin or work with a huge collaborative team. This post will describe to you how to create your own prepackaged Vagrant Box from and existing virtual machine. In my opinion, it’s the quickest and easiest way for beginners to get started with Vagrant. This way you’ll be able to reuse it over and over and even share it. I feel this generally goes against the main idea of Vagrant where you provision your development environments from a single config. You generally lose a lot of the debugging and configurability of your development environment, but this should be helpful for plenty of developers, teams, and projects regardless.
The first thing you’ll need to do is pick a box that you want to build from. The Vagrant Cloud lets you easily find boxes that people have shared. We’ll be working off of Hashicorp’s (Vagrant’s) Precise64. This box is a good one to work off of because Chef and Puppet are already installed, plus all the settings we’re configured by the creator(s) of Vagrant. 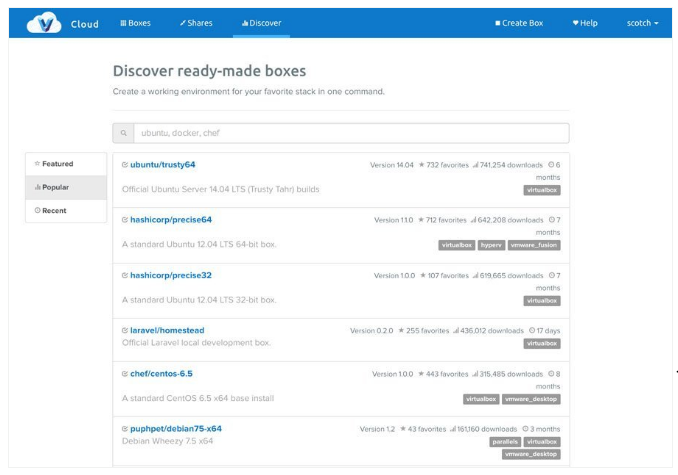
After you’ve chosen a box, initialize the Vagrant box. Each one is slightly different, but here’s how to do it for the example we’re doing: vagrant init hashicorp/precise64 This will also create a Vagrant file for you. Now, boot the box with Vagrant by doing (it will need to download if it’s the first time using the it): vagrant up
We’ll now SSH into the box and start customizing it. If you don’t know anything about servers, you can always just use Scotch Boxsince all of this is already done for you. Here’s how to SSH into the box: vagrant ssh Now, we need to setup our server by installing whatever we want on it. This example will install a basic LAMP stack, but you can do whatever you like (Ruby, Nginx, etc.). The point of this article isn’t to teach you how to setup a server, but instead how to turn your virtual environment into a Vagrant Box. So this step might be more involved than what is actually shown: sudo apt-get update sudo apt-get upgrade sudo apt-get install vim sudo apt-get install apache2 sudo apt-get install mysql-server libapache2-mod-auth-mysql php5-mysql sudo mysql_install_db sudo /usr/bin/mysql_secure_installation sudo apt-get install php5 libapache2-mod-php5 php5-mcrypt sudo apt-get install php5-cgi php5-cli php5-curl php5-common php5-gd php5-mysql sudo service apache2 restart
We’re now going to clean up disk space on the VM so when we package it into a new Vagrant box, it’s as clean as possible. First, remove APT cache sudo apt-get clean Then, “zero out” the drive (this is for Ubuntu): sudo dd if=/dev/zero of=/EMPTY bs=1M sudo rm -f /EMPTY Lastly, let’s clear the Bash History and exit the VM: cat /dev/null > ~/.bash_history && history -c && exit
We’re now going to repackage the server we just created into a new Vagrant Base Box. It’s very easy with Vagrant: vagrant package --output mynew.box
The previous command will have created a “mynew.box” file. You can technically put this wherever you want on your computer. Now, let’s add this new Vagrant Box into Vagrant: vagrant box add mynewbox mynew.box This now will “download” the box into your Vagrant install allowing to initiate this from any folder, but before we do this, let’s delete and remove the Vagrant file we built this box from.
vagrant destroy
rm Vagrantfile
We need to now initialize a Vagrant environment from our brand new box using the same command from earlier but referencing the new Box. vagrant init mynewbox
When you initialize the Vagrant environment, it creates a Vagrantfile for you (just like from before). Open the Vagrantfile and delete everything. You can use what was in there as a reference or just use Vagrant’s Official Docs, but we’re going to only use the absolute essentials that I’ve already spelled out for you. Now paste the following bare-bones code into your Vagrantfile: Now let’s create a landing page: vim index.php And add the following line to demo what we just installed with PHP: phpinfo();
Now, visit the IP address from the Vagrantfile in your browser. If everything works, you should see a PHP info dump of the index.php file you just created. 
Now that you’ve just created your own Vagrant Base Box from an existing one, you should consider sharing it on the Vagrant Cloud. This way other people can download and use it!
You liked the article?
Like: 0
Vote for difficulty
Current difficulty (Avg): Medium

TekSlate is the best online training provider in delivering world-class IT skills to individuals and corporates from all parts of the globe. We are proven experts in accumulating every need of an IT skills upgrade aspirant and have delivered excellent services. We aim to bring you all the essentials to learn and master new technologies in the market with our articles, blogs, and videos. Build your career success with us, enhancing most in-demand skills in the market.

