The data binding is the concept of creating link between source and silverlight control, the data binding we can classify in to three types

Open new silverlight application
Add list box, data grid and button control

Go to mainpage XAML code behind window
Public partial class main page: user control
{
Public class emp
{
Public string ename {get; set; }
Public int eno {get; set;}
Public int esal {get; set;}
}
List <emp> obj;
Public void get data()
{
Obj = new list <emp> ();
Obj. add (new emp() {ename = “aaa”, eno =123, esal = 5000}0;
Obj.add (new emp() {ename=”666”, eno = 321, esal = 2000}0;
}
Private void button :- click (object sender, routed E vent arges e )
{
Getdata ();
/: st Box1. Items source = obj;
Datagrid1. Itemssource = Obj;
}
}
Go to SAML mode in the list box control tag
<list box height = “221”>
<listbox. Item template>
<data Template>
<list box item>
<stack painel orientation = “horizontal”>
<text block text = “{binding ename, mode=onetime}”>
</textblock>
<text block text = “{binding eno, mode = onetime}”>
</text block>
<Text Block Text = “{Binding esal, mode = onetime}”>
</textblock>
</stack panel>
</list box item>
</datatemplate>
</listbox. Item template>
</list box>
In the data grid control set auto generate columns = “True”
Silver light will support 3 types of data binding
One – way binding
Two-Way binding
One-Time
One Time Binding In one time binding we bind the data first time from source to target
If any modification made righter in source or target that will not be objet affected in source or target.

In this method we bind the data from source to target and whenever data is modified in source that will get affected/ updated at target automatically
This is the default mode

In this method we bind the data from source to target, then whenever date is updated in source or in tougher it will be updated automatically into other.

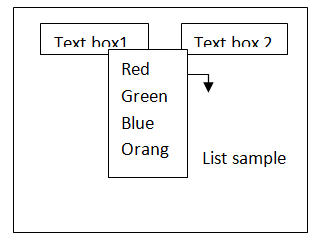
Then 4 list box items will be added
Select first list box item
In target control property we write our binding element like
{Binding path = data field name/properties
Mode = value, update source Trigger = value}
One time default
One way explicit
Two way (used with two way)

Up date source:- This method is use to update the source data when the data is updated with in the target.
To create object for expression class we use another method known as binding expression of the target control i.e. get binding expression (depending property)
Syntax:-
Class name object name = target control ID.
Get- binding expression (Dependency property);

Ex:- Binding expression BE= Text Box1. Getbinding expression (text box. Text)
Note:- This binding expression class and get binding expression methods if we want to implement 2 way mode binding
Data context property of the controls
This property is used to set the object name of the class with which the data field we want to bind the data
Example with binding of the data with class

Add a silver light page to the app only in vs 2010
Public class cls employee
{ string designation;
Public string p designation
{
Set { Designation = vaule:}
Get {return designation}
}
}
Write the following code in page class
Partial class page 1 : page
{
Cls employee obj = new cls employee ():
Public page 1 () constructor
{
Initialize component ();
Obj1. P designation = “programmer”;
Text box1. Data contentment = Obj1;
}
Go to XAML source code and write the following code and write the following code to implement binding
<Text box name = “text box1”………..
Text = “{binding path = P designation mode = one way }”/>
Using system. Windows. Data;
CLSEM ployeec obj1= new close ployeec2.
Public page 1 ()
{
Obj1. P designation = “ programmer”;
Text box 1 = datacontex1= obj 1;
}
Private void btn submit-click(---)
{

Binding ex press ion BE= text box 1. Get binding expression (text box1. Text);
Text block 4. Text = objt. P designation;
Text block 5. Text = ob1. P designation;
}
Go to design of page1. Xaml.
Go to xaml source
Change the code of text box1. Binding like
Binding path= designaing – mode= two way, update source trigger = exploit “/>
Run the application & check.
You liked the article?
Like: 0
Vote for difficulty
Current difficulty (Avg): Medium

TekSlate is the best online training provider in delivering world-class IT skills to individuals and corporates from all parts of the globe. We are proven experts in accumulating every need of an IT skills upgrade aspirant and have delivered excellent services. We aim to bring you all the essentials to learn and master new technologies in the market with our articles, blogs, and videos. Build your career success with us, enhancing most in-demand skills in the market.

