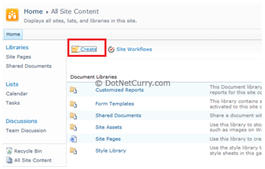
Once we’ve defined the content type we are free to use it sitewide. In our case, we’ll create a new Library/List just to store functional specs. So navigate to existing ‘Libraries’ and click on ‘Create’. (In the below example going to use Document Content type with Document library)
In the popup select ‘Library’ and ‘Document Library’.

Give a Name and click on More Options. Select settings as shown below and click ‘Create’

Learn SharePoint by Tekslate - Fastest growing sector in the industry. Explore Online "SharePoint Training" and course is aligned with industry needs & developed by industry veterans. Tekslate will turn you into a SharePoint Expert.
Now we’ve to tell SharePoint that for this document library use the newly defined content type. To do this we need to apply the following changes:
Step 1: Go to Site Settings and under Site Administration select Site Libraries and List to get to the list of available libraries.
Step 2: Click on ‘Customize “Functional Specifications Library” as shown in the screenshot above, to navigate to the following page
Step 3: Click on Advanced Settings to enable content Management by selecting ‘Yes’ for Allow management of content types Once we click okay we’ll see a new Content Pane is now visible in the List Information page
Step 4: Click on ‘Add from existing content types’ link to select our newly created content type Click Ok to add the content types
Step 5: We don’t want users to use any other content type so we’ll ‘Change new button order and default content type’

To do this we make the Document content type invisible. That’s it, we are done.
Step 1: Navigate to the page library and select the Documents Ribbon. Then select the New Document pull-down menu, you’ll see the newly defined template as the only template to select from
Step 2: Select it and give a name to the new specification doc and click Create

Step 3: SharePoint Foundation will pop up a rich text editor. This editor comes up based on the ‘Layout’ defined. Currently, our page library uses the ‘Base Page’ layout. Hence it does not know what fields to show here. How to create custom layouts is a separate topic and out of scope for this article. Then how do we see the fields that we added in the custom type? Cancel out of the Rich Text editor and click on the Page ribbon tab.
Step 4: From the Edit Properties pull-down menu, select View Properties.
Step 5: Now you can see all the columns we defined for our content type
Step 6: Expand the popup to fill the screen and click on Edit Properties
Step 7: Save changes and Check-in. We are done.
You liked the article?
Like: 0
Vote for difficulty
Current difficulty (Avg): Medium

TekSlate is the best online training provider in delivering world-class IT skills to individuals and corporates from all parts of the globe. We are proven experts in accumulating every need of an IT skills upgrade aspirant and have delivered excellent services. We aim to bring you all the essentials to learn and master new technologies in the market with our articles, blogs, and videos. Build your career success with us, enhancing most in-demand skills in the market.

