Testing and Validating a Repository in OBIEE
Testing and Validating a Repository
You have finished building an initial business model and now need to test and validate the repository before continuing. You begin by checking the repository for errors using the consistency checking option. Next, you load the repository into Oracle BI Server memory. You then test the repository by running an Oracle BI analysis and verifying the results. Finally, you examine the query log file to observe the SQL generated by Oracle BI Server.
To test and validate a repository you perform the following steps: • Check Consistency • Disable Caching • Load the Repository • Set Up Query Logging • Create and Run and Analysis • Check the Query Log
Check Consistency
1. Select File > Check Global Consistency.

Desired to gain proficiency on OBIEE Training? Explore the blog post on OBIEE training to become a pro in "OBIEE Training Online"
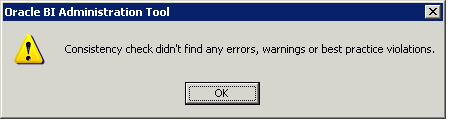
2. You should receive the message Business model "Sample Sales" is consistent. Do you want to mark it as available for queries?
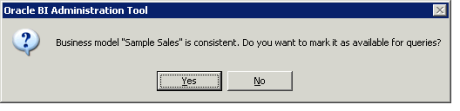
3 . Click Yes. You should receive the message: Consistency check didn't find any errors, warnings or best practice violations.
If you do not receive this message, you must fix any consistency check errors or warnings before proceeding.
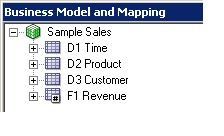
4. Click OK. Notice that the Sample Sales business model icon in the BMM layer is now green, indicating it is available for queries.
5 . Save the repository without checking global consistency again.

6 . Select File > Close to close the repository. Leave the Administration Tool open.
Disable Caching
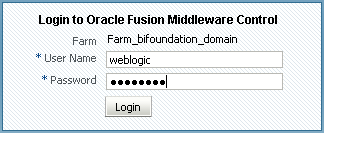
- Open a browser and enter the following URL to navigate to Enterprise Manager Fusion Middleware Control: http://<machine name>:7001/em In this tutorial the URL is http://localhost:7001/em
- Log in as an administrative user. Typically you use the administrative user name and password provided during the Oracle BI installation. In this example the user name is weblogic.
3 . In the left navigation pane, expand Business Intelligence and click core application.
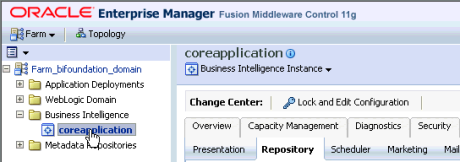
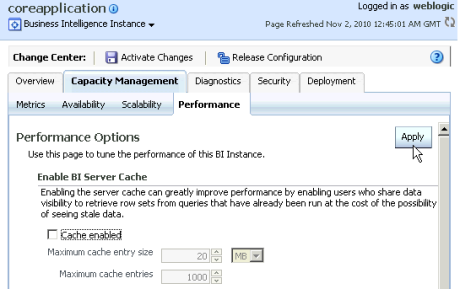
4 . Click the Capacity Management tab.
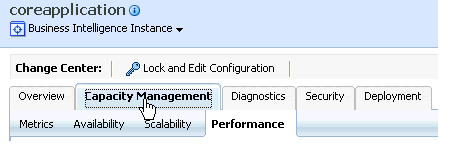
5 . Click the Performance sub tab.

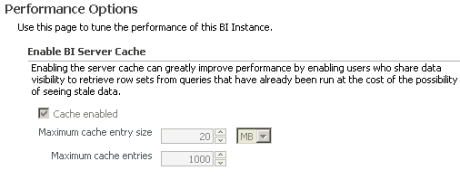
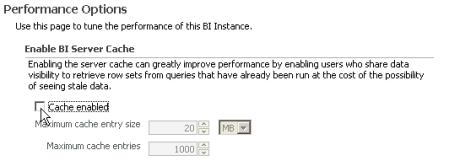
6 . Locate the Enable BI Server Cache section. The cache is enabled by default.
7 . Click Lock and Edit Configuration.

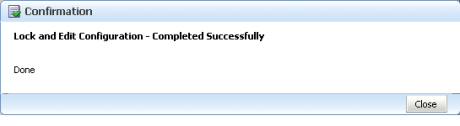
8 . Click Close when you receive the confirmation message "Lock and Edit Configuration - Completed Successfully."
9 . Deselect Cache enabled. Caching is typically not used during development. Disabling cache improves query performance.
10 . Click Apply.
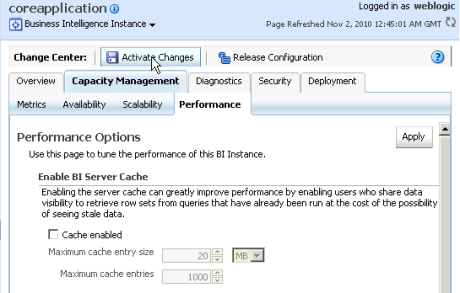
11 . Click Activate Changes.
12 . Click Close when you receive the confirmation message Activate Changes - Completed Successfully.

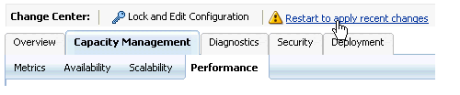
13 . Do not click Restart to apply recent changes yet. You do that after uploading the repository in the next set of steps.
Load the Repository
1. Click the Deployment tab.

2 . Click the Repository sub tab.

3 . Click Lock and Edit Configuration.
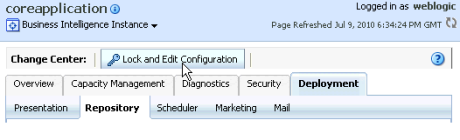
4 . Click Close when you receive the confirmation message "Lock and Edit Configuration - Completed Successfully."

5 . In the "Upload BI Server Repository" section, click Browse to open the Choose file dialog box.

6 . By default, the Choose file dialog box should open to the repository directory. If not, navigate to the repository directory with the BISAMPLE repository.

7 . Select the BISAMPLE.rpd file and click Open.
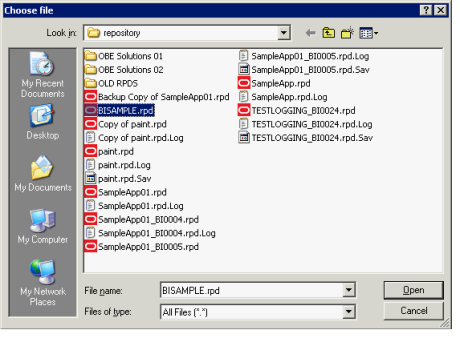
8 . Enter BISAMPLE1 as the repository password and confirm the password.

9 . Click Apply.
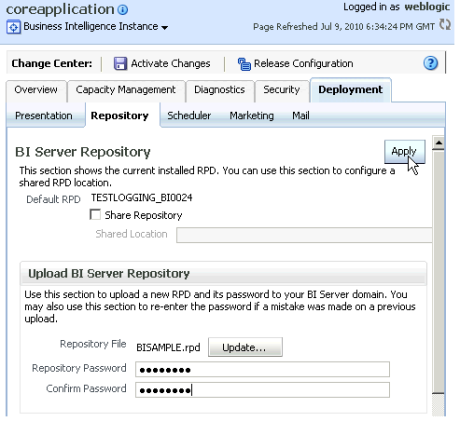
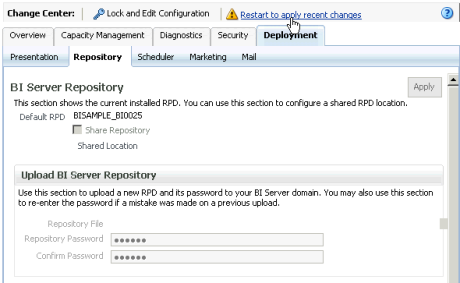
10 . In the BI Server Repository section, confirm that the Default RPD is now BISAMPLE with an extension. In this example, the file name is BISAMPLE_BI0025.

11 . Click Activate Changes.

12 . Click Close when you receive the confirmation message Activate Changes - Completed Successfully.

13 . Click Restart to apply recent changes to navigate to the Overview page.
14 . On the Overview page, click Restart.

15 . Click Yes when you receive the message Are you sure you want to restart all BI

16 . Allow the Restart All processing to complete. This may take a few moments.
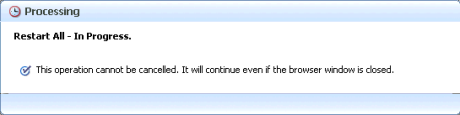
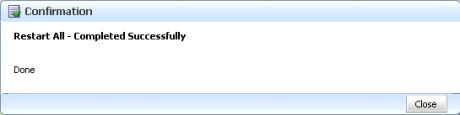
17 . Click Close when you receive the confirmation message Restart All - Completed Successfully.
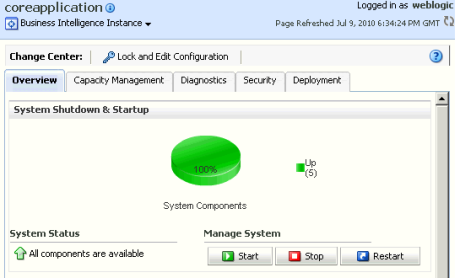
18 . Confirm that System Components are 100% and that five components are up. Leave Fusion Middleware Control open.
For an in-depth understanding of OBIEE click on:
You liked the article?
Like : 0
Vote for difficulty
Current difficulty (Avg): Medium
About Author

Name
TekSlate is the best online training provider in delivering world-class IT skills to individuals and corporates from all parts of the globe. We are proven experts in accumulating every need of an IT skills upgrade aspirant and have delivered excellent services. We aim to bring you all the essentials to learn and master new technologies in the market with our articles, blogs, and videos. Build your career success with us, enhancing most in-demand skills in the market.
Stay Updated
Get stories of change makers and innovators from the startup ecosystem in your inbox