SharePoint Lists
SharePoint List
A list is a Web site component where your organization can store, share, and manage information. For example, you can create a task list to track work assignments or track team events on a calendar. You can also conduct a survey or host discussions on a discussion board. Although there are different types of lists, the procedure for adding items to them is similar, so you don't need to learn several new techniques to work with different types of lists. A list item contains text in a series of columns, but some lists may allow attachments to be added to the item.
Aspired to become a SharePoint? Explore the post to discover the know-how on the " SharePoint Training" course.
Create a list
- To create a list, click the Site Actions menu, and then click More create options.
- Note: If you do not see the Site Actions menu or if the option to create does not appear, you may not have permission to create a list.
- On the Create page, click the type of list you want to create. For example, Links.
- Type a Name for the list, complete any other fields you want to complete, and then click Create.
Add an item to a list
- In the list where you want to add the item, click the Items tab on the ribbon. (It's the Events tab for a calendar.)
- Click New Item (New Event for a calendar).
- Tip: Another quick way to add an event to a calendar is to point to the date on the calendar, and then click Add.
- Complete the required fields and any others that you want to complete.
- Click Save.
Edit or delete an item in a list
- Point to an item and then select the checkbox that appears next to the item.
- Tip: You can perform actions on multiple items by selecting multiple checkboxes.
- On the Items tab on the ribbon, click either Edit Item or Delete Item, as appropriate.
Note: On many types of sites, some lists are created for you. These default lists range from a discussion board to a calendar list. If you have permission, you can also create lists from several types of list templates, which provide structure and settings to give you a head start.
Create a column in a list or library
The following procedure starts from the list or library page to which you want to add the column. If the list or library is not already open, click its name on the Quick Launch. If the name of your list or library does not appear, click View All Site Content, and then click the name of your list or library.
- In the ribbon, click the List or Library The name of the tab may vary depending on the type of list or library. For example, if your list is a calendar, the name of the tab is Calendar.
- In the Manage Views group, click Create Column.
- In the Create List dialog box

- In theName and Type section, type the name that you want for the column in the Column name
- The type of information in this column is, select the type of information that you want to appear in the column.
- Note: Depending on the type of column that you select, you may be unable to change the type of column type after you create it.
- In the Additional Column Settings section, type a description in the Description box to help people understand the purpose of the column and what data it should contain. This description is optional.
- Note: Depending on the type of column that you selected, more options may appear in the Additional Column Settings Select the additional settings that you want.
- To add the column to the default view, which people on your site automatically see when they first open a list or library, make sure that Add to default view is selected
- If you want the data in the column validated, in the Column Validation section, type the Formula that you want to use to validate the data, and type the User message that you want to prove users to help them type valid data. The Column Validation section is not available for all types of columns
- Click OK
Change the settings for a column in a list or library
You can change the settings for a column, such as the name of the column. Depending on the type of column and the type of list, you can make additional changes, such as how much text a user can enter. Programs such as SharePoint Designer 2010 offers even more options for modifying columns, such as specifying the column width.
- If the list or library is not already open, click its name on the Quick Launch.
- If the name of your list or library does not appear, click View All Site Content, and then click the name of your list or library.
- In the Ribbon, click the List or Library The name of the tab may vary depending on the type of list or library. For example, if your list is a calendar, the name of the tab is Calendar.
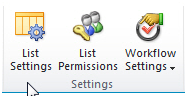
- In the Settings group, click List Settings or Library Settings.

On theList Settings or Library Settings page, in the Columns section, click the name of the column that you want to change. Change the settings that you want, and then click OK.

Delete a column from a list or library
Note: This procedure deletes the column and any data in the column. You cannot restore the column from the Recycle Bin.
- If the list or library is not already open, click its name on the Quick Launch.
- If the name of your list or library does not appear, click View All Site Content, and then click the name of your list or library.
- In the Ribbon, click the List or Library The name of the tab may vary depending on the type of list or library. For example, if your list is a calendar, the name of the tab is Calendar.
- In the Settings group, click List Settings or Library Settings.
- On theList Settings or Library Settings page, in the Columns section, click the name of the column that you want to delete.

- Scroll to the bottom of the Change Column page and then click Delete.
- Note: Lists and libraries contain required columns that cannot be deleted, such as the Title or Name. If the column cannot be deleted, the Delete button is not available. If you cannot delete a column, but you do not want the column to appear in a view, you can remove it from the view.
- When prompted, click OK.
View the version history of an item or file in a list or library You can view the version history of any item or file in any list or library on your site to which you have Read permission. Some document libraries are set up so that anyone can view all versions, whether major or minor, and other libraries limit viewership of minor versions to people who have specific permissions. Major versions are always in whole numbers, such as 1.0, 2.0, and so on. Minor versions are denoted by decimals following a major version number, such as 1.1, 1.2, and 1.3, and so on. Note: Minor versions are available only in libraries, not in lists... In general, major versions are those that have reached a certain milestone, such as the end of a chapter, or a draft that is ready for review. Minor versions are usually interim updates to a file while it is being developed. The author may not want the file to be seen by other people until it reaches a certain state of readiness.
To View:
- Navigate to the list or library that contains the item or file you want to explore.
- Hover over the item or file for which you want to view the history, click the arrow that appears, and select Version History from the drop-down list.

The Version History dialog box opens. 
- See image above
- The most recent minor version (1)
- A comment left by the last person who checked in the file. (2)
- The first version of the file. The first version is always numbered 1.0. (3)
- To view a particular version of a file, look at the time and date listings in the Modified column of the Version History dialog box and click the one that interests you. The item or file opens up in a separate window where you can view it.
- Close the item or file when you have finished viewing it.
- To return to your list or library, close the Version History dialog box.
Note: Depending on your permissions, you can restore, unpublish, or delete a version by pointing to its name, click the down arrow, and then selecting the appropriate command.
You liked the article?
Like : 0
Vote for difficulty
Current difficulty (Avg): Medium
About Author

Name
TekSlate is the best online training provider in delivering world-class IT skills to individuals and corporates from all parts of the globe. We are proven experts in accumulating every need of an IT skills upgrade aspirant and have delivered excellent services. We aim to bring you all the essentials to learn and master new technologies in the market with our articles, blogs, and videos. Build your career success with us, enhancing most in-demand skills in the market.
Stay Updated
Get stories of change makers and innovators from the startup ecosystem in your inbox