Web Application Creation
To create a Web application, you must be a member of the Administrators group on the farm and the local machine running the SharePoint 2010 Central Administration. A Web application consists of an IIS (Internet Information Services) website each may combine one or more site collections that you create. The first step is to create a Web application. Open the SharePoint 2010 Central Administration:  In the Application Management section, click the Manage web applications link. The page lists the referenced web applications on the server. For a basic installation, you have two:
Aspired to become a SharePoint? Explore the post to discover the know-how on the " SharePoint Training" course.
- The default site: SharePoint - 80
- The administration site: SharePoint Central Administration v4
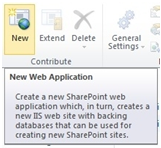
- Click the New button in the toolbar to open the creation form:
- Regulars of SharePoint 2007 will notice that this form has many similarities to the functional level. By cons, level design, opening in a layer shows a part of the efforts made by Microsoft to improve the ergonomics of the product.
- The authentication section offers a choice between two types of authentication:
- Claims-Based Authentication
- Classic Mode Authentication
- The default choice is classic Mode Authentication, a classic Windows authentication. The authentication type Claims Based Authentication aims to make it simpler authentication through systems such as Active Directory and provide Single-Sign-On methods for applications based on a shared environment or Cloud.
- We will choose the default authentication type classic Mode Authentication to our new web application.
- You can use an existing IIS Web site or create a new completely dependent on others. Choose to create a new IIS Web site and name it the sandbox.
- Change the value of the port field by 80.
- Specify in the host Header filed the value sandbox.priv.
- You can leave the default value for thePath field: C:inetpubwwwrootwssVirtualDirectorieswww.sandbox.priv80
- The first is the authentication provider (Authentication provider), you can choose between valuesNegotiate (Kerberos) and NTLM. The latter is the default choice of the form. The choice of the authentication provider will depend on your infrastructure, in our case, a single server without Active Directory, we will use the NTLM
- The second option allows you to enable or disable anonymous access on the site. If you choose to allow anonymous access, access will be using the machine-specific anonymous access accounts. Site administrators can configure the use of anonymous access to their sites. If anonymous access is not permitted at the Web application, it will not be at the site. For this article, we choose No.
- The third and final option is to specify whether SSL is used. If you want to enable SSL on your Web application, you must configure IIS more finely (How to configure SSL on IIS7).
- Enter the URL of the web application. It will be used as a base in the links on the pages in this zone of the Web application. The default URL is the name and port of the current server, it's automatically updated according to the SSL settings, header host, and port number defined on the form.
- The value of the zone field is automatically defined on Default. The zone can be changed when you extend a Web application.
- Each Web application is represented by a different IIS Web site with a unique application pool or a shared one. This section lets you specify whether you want to use an existing application pool or create a new one. We choose to create a new application pool names and Box.
- When creating a new application pool, you must specify the user who executes it. This choice is important because this account must have permissions to access different parts of the server. You can create a specific user or select an existing one. We choose predefined and the Network Service
- When you create a Web application, you also create a database of content and set the authentication method used to connect to the database. This section allows you to choose the database server to use, by default, the SQL server which is running the administration is selected in the Database Server
- the database Name field is the name of the database to be created on the SQL server. By default, the name is a GUID prefixed by WSS_Content_. We will name it SandBox.
- This section also lets you set the authentication method used for the Web application connects to the SQL Server. There are two options: Windows authentication (recommended) and SQL authentication. The Windows authentication method is recommended because the login information is sent encrypted to the SQL server. The account used will be the application pool. This implies that the user running the application pool for Web application can access to SQL server.
- This section allows you to specify a mirror SQL server. In case of a problem on the SQL server, queries are sent to the following. The authentication method and the account used for this mirror server will be the same settings as the principal server.
- This section allows you to specify the search server used. It's set to use the SharePoint Server search.
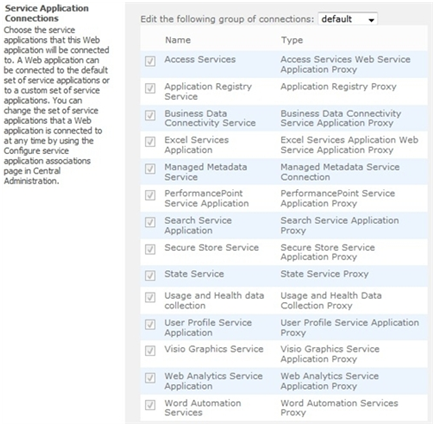
- In this section, select the connections to the service application that will be available for the Web application. From the dropdown menu, choose default or [custom]. The [custom] option lets you choose the connections to the service applications that you want to use for the Web application. The default is to make available all services.
- We will choose the default option in this section.
- Customer Experience Improvement Program
- In this section, simply click yes or No to specify whether you want to participate in the CEIP (Customer Experience Improvement Program)
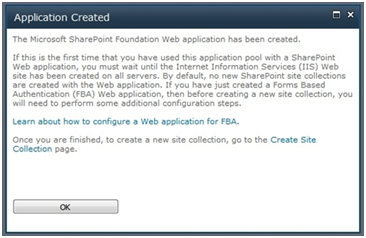
- The configuration is now complete, click OK to validate the creation of the Web application. When the creation process is completed, you receive a confirmation message:
Checkout SharePoint Tutorial
- You can go to IIS to see the new IIS Web site and on your SQL server to verify the creation of the new database:

Creating the site collection
- To create a new site collection, you can either click on the Create Site Collection link in the message confirming the creation of a new Web application or click the Create Site Collections link from the Application Management section on the homepage of the central administration.
The form for creating a site collection is very similar to SharePoint 2007: 
- This section allows you to specify on which Web application the new site collection will be created. We choose the application you created earlier.
- You can specify the title of the collection sites and give a description.
- This section allows you to specify the base folder of the site collection; it can be the root folder or the folder sites. There can be only one site collection to the root of a Web application, then others will be on the folder sites.
- Template Selection
- The site template defines the basic functionality will be enabled. This choice depends greatly on the type of project to be realized. We choose the publishing Portal under the tab Publishing. This is a site template including workflow features for publishing content.
Here you must specify a user (you can not specify a group) as the administrator of the collection site. We choose the server administrator. Like the previous option, this section allows administrators to define a second site collection administrator. This field is optional and we leave it empty.
- This last section allows you to specify a quota for the site collection.
- Click the OK button to begin creating the site collection.
- After you have updated your DNS or Host file, you should be able to access the site via its URLhttp://www.sandbox.priv:
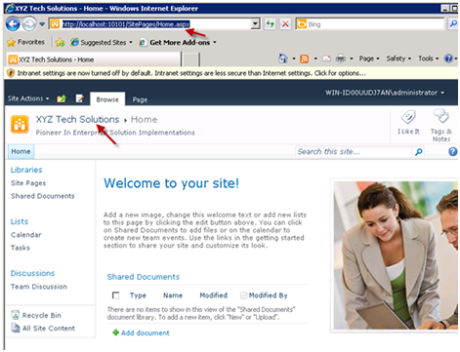
- As I created site collection at the root of the web application (listening at port 10101), you can directly access it using “http://SharePointServerName:10101” and you should see the screen as follows:
- You can also check the site collection details in the database as shown below:
SELECT SiteId AS SiteGuid, Id AS WebGuid, FullUrl AS Url, Title, TimeCreated FROM dbo.Webs WHERE (ParentWebId IS NULL) 
Create a site collection by using Windows Power Shell
You typically use Windows Power Shell to create a site collection when you want to automate the task, which is common in enterprises.
To create a site collection by using Windows Power Shell
- Verify that you meet the following minimum requirements: SeeAdd-SPShellAdmin.
- On the Start menu, click All Programs.
- Click Microsoft SharePoint 2010 Products.
- ClickSharePoint 2010 Management Shell.
- From the Windows PowerShell command prompt (that is, PS C:>), type the following command and press ENTER:
6. Get-SPWebTemplate7. $template = Get-SPWebTemplate "STS#0"8. New-SPSite -Url "<URL for the new site collection>" -OwnerAlias "<domainuser>" -Template $template This example retrieves a list of all available site templates and then creates a site collection by using the Team Site template. For more information, see New-SPSite and Get-SPWebTemplate. We recommend that you use Windows PowerShell when performing command-line administrative tasks. The Stsadm command-line tool has been deprecated but is included to support compatibility with previous product versions.
Create a site
- Open site collection in the browser. If you are following from previous articles, it would look like the following
- Go to Site Actions –> New Site as shown below
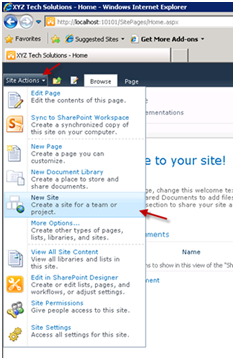
- Select a template (in this case, “Team Site”), provide name and URL, and finally click on “Create” (you can customize more using the “More Options” button)

- The site gets created and it looks something like the following

- If you go back to Site Collection, you should also site as shown below:
 You can follow the same above method for creating sub-sites, except that you would start with site instead of site-collection. Most of the options available for “Site Collection” would also be available for “Site”. Second Approach: We can also achieve similar to above using a different approach
- go to Site Actions –> Site Settings as shown below
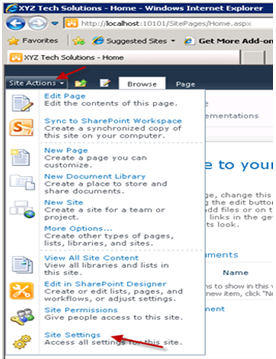
- Under “Site Administration”, select “Sites and Workspaces”

- You can click on “Create” at the top
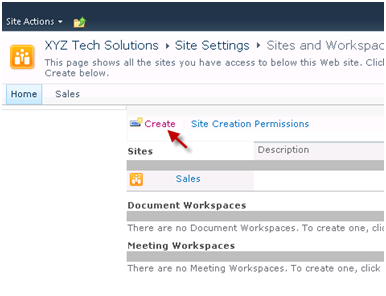
- Provide site details as necessary
- Customize as necessary and click on “Create”
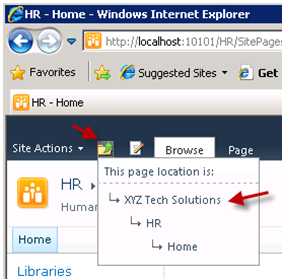
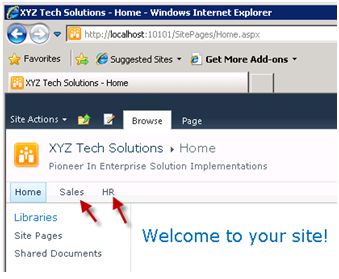
- Once created, you should see a new “HR” site
- You can use the “up” button to go through different site hierarchies
- Once you move back to “Site collection” home, you should see both sites available from home page of site collection as shown below
- You can also check the above sites in the database as shown below
SELECT SiteId AS SiteGuid, Id AS WebGuid, FullUrl AS Url, Title, TimeCreated FROM dbo.Webs  Another approach is to go to “Site Actions –> View All Site Content” and filter “View” with “Sites and Workspaces” and click on “Create” at the top as shown below:


