Client Setup
After installation the next setup to configure a client which will be used to connect to this EBS instance. Here it is assumed that, ---->The server and client both are on LAN or connected through cross cable (Peer to Peer). ---->The client OS is MS Windows XP with Internet Explorer installed. ---->There is no DNS and hosts file will be used for name resolution. Now we will try to connect from client and will resolve all the issues step by step. 1. Windows XP Client Setup 1.1. Open Internet Explorer and enter the URL of your application server and port. 1.2. The Page Cannot be Displayed error will appear. 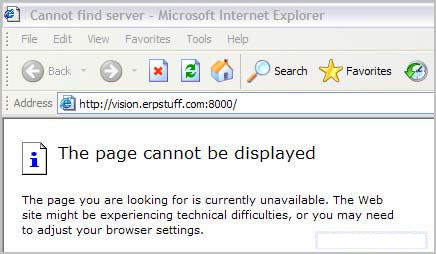 1.3. Now open Command Prompt (DOS prompt) and try to ping both IP and URL of application server.
 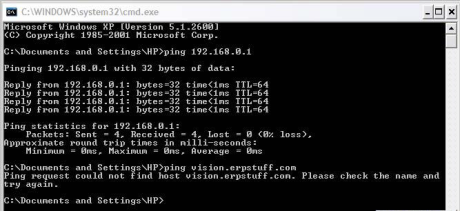 1.4. First we used IP to ping and it was successful which means out connectivity with the server is fine. 1.5. Now when we used URL to ping it was not successful. This is because we have not configured DNS which is used to resolve names. Here we have two options to resolve this issue one is to ask Network Admin to set it up on DNS server or use client hosts file for resolution. The hosts file bottleneck is that on each client in your network you will have to insert entry in the hosts file DNS is one time setup. 1.6. Here we will demonstrate changing hosts file. 1.7. Open hosts file from the following path, C: \WINDOWS\ system32\drivers\etc\hosts Note: Your drive can be different so find the Windows folder. The hosts will has no extension so it will prompt for application to open select Note Pad and open the file. 1.8. Insert the following line and save the file, 192.168.0.1 vision.erpstuff.com vision Note: Here the IP is of your EBS server.
  1.9. Now ping the URL once again on Command Prompt and see the result.
  1.10. I f still this login screen is not appeared then you need to bypass proxy settings. 1.11. Open LAN settings IE: Tools > Internet Options > Connections > LAN Settings.
  1.12. Here your Proxy server may be configured to use Internet on this PC so enable Bypass proxy server for local addresses. 1.13. Click on Advanced (B). 1.14. Enter vision.erpstuff.com (Your EBS URL) in the Exceptions box.
 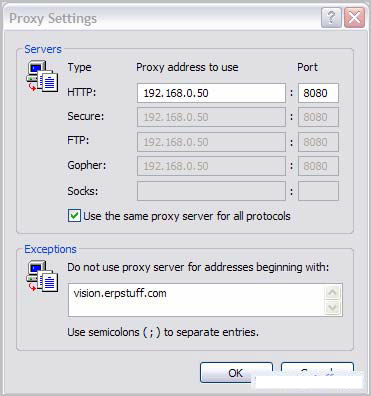 1.15. Click on OK (B) and close all the opened forms. 1.16. Now on the login screen enter sysadmin as username and sysadmin as password. 1.17. After login when you will try to open any function the following error will appear.
  1.18. This is basically due to disabled ActiveX as EBS is trying to install J2SE. 1.19. Now once again open IE: Tools > Internet Options > Security > Internet > Custom Level and change ActiveX control properties from Disable to Enable. 1.20. Now try again and the J2SE setup will be started.
  1.21. Click on Accept (B) and the setup will be started and I am sure if you will click on Decline (B) you will not be able to proceed.
  1.22. Click on Finish (B) and the setup is complete and the Application will now open normally.
You liked the article?
Like : 0
Vote for difficulty
Current difficulty (Avg): Medium
About Author

Name
TekSlate is the best online training provider in delivering world-class IT skills to individuals and corporates from all parts of the globe. We are proven experts in accumulating every need of an IT skills upgrade aspirant and have delivered excellent services. We aim to bring you all the essentials to learn and master new technologies in the market with our articles, blogs, and videos. Build your career success with us, enhancing most in-demand skills in the market.
Stay Updated
Get stories of change makers and innovators from the startup ecosystem in your inbox